In the EZ Battery Reconditioning program, we show you several different ways to recondition your car battery. For some of these methods, you may want to remove your battery from your car so it’s easier to work on…
And if you do this, you’ll also have to know how to put your reconditioned battery back into your vehicle…
Or maybe you’re using our Battery Business guide and starting your own battery reconditioning & service business, where you will have to remove and install batteries…
So, in this guide, I want to show you how to safely take your car battery out of your car and then, how to put the battery back into your car once you’re done working on it.
This guide is broken down into five sections:
- The simple tools you need to change your battery
- Basic safety precautions
- How to remove a car battery (step-by-step instructions)
- How to re-install a car battery (step-by-step instructions)
- Then we’ll close with FAQs about car battery removal and installation
So, let’s get started!…

Tools Needed to Change a Car Battery

Before you get started, make sure you have this equipment:
- Wrench: You will use this to loosen the nuts on the battery terminals.
- Side battery terminal wrench (mainly used for GM terminals): If you are working on a GM battery, or a battery with side terminals, you will need this type of wrench (*we’ll discuss this more later in this guide).
- Work gloves: Car batteries store acid that can burn your skin if exposed. Always wear gloves when you handle the car battery.
- Zip ties: You can use zip ties to secure the cables and keep everything organized. You will also prevent the cables from touching, which could produce sparks.
- Safety glasses: These may not be that stylish, but your eye safety is more important. Lead-acid batteries, like car batteries, have acids inside them (as the name implies). And you want to make sure this acid never has a chance to make contact with your eyes.
Car Battery Replacement Safety Guidelines

When working with car batteries, there are some basic but important safety precautions you should always take. So please make sure you follow these guidelines while working on your battery:
- Remove jewelry: This includes your watches, rings and necklaces. If metal touches the car battery, it could create an electric discharge, which is something you don’t want to deal with.
- Work outdoors or in an area with ventilation: Defective batteries can release toxic gases, and you can help avoid exposure to these by working outside.
- Be careful of flames & sparks: Don’t expose the battery to any flames from cigarettes, ignition sources, sparks or any other source.
- Wear safety gloves and glasses: We mentioned these in the “Tools” section above. Also, try to wear clothing that protects as much of the rest of your body as possible.

How To Remove a Car Battery
(Step-by-Step Guide)
Now it’s time to get down to business. For the most part, these are the instructions needed to remove most car batteries.
*Note: there are a couple circumstances when you may need to do slightly different steps than what we demonstrate below. Here are three such examples:
(Side Battery Terminals) If your battery has side battery terminals (like in GM models) you’ll need to remove it slightly differently – we include a special section about this later in the guide.
(Additional Parts) You might also need to remove various parts that could be covering the battery in a few models, such as support brackets, a battery cover, etc.
(Diesel Pickups/Two Batteries) If your vehicle has two batteries (like in a diesel pickup), you’ll need to use slightly different steps also – we include a special section about this later in the guide.
So with that being said, here’s how to remove a battery from a vehicle…
1. Disconnect the Negative Terminal

You should always start your battery removal procedure by disconnecting the negative battery terminal. This generally features a black cable, but might also have a negative sign on it.
Once you locate the negative terminal, use your wrench to loosen the cable from the negative terminal. Once you fully remove the cable, secure it out of the way.
2. Disconnect the Positive Terminal

Repeat the steps above with the positive terminal. The positive terminal is the one with a positive sign on it, and is normally the one with the red cable.
Once you remove the red cable from the positive terminal, make sure you secure the cable with a zip tie separate from the negative side. Also, make sure you don’t let this cable touch anything metal because it could be carrying a residual current.
3. Remove Securing Bracket

Once the battery is disconnected, you can remove the hold-down bracket that keeps the battery in place. Use your wrench to undo the fasteners. With some designs, you may require a socket to help with removal.
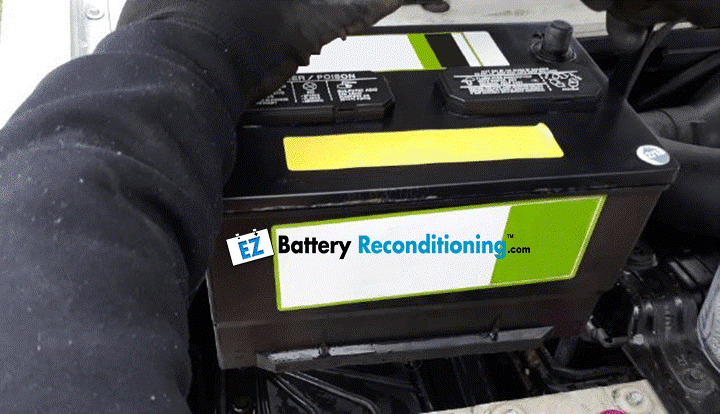
4. Remove the Battery

Now that the battery is free, you will be able to lift it out of the car. Car batteries can be heavy, weighing up to forty pounds, so ensure you have a good stance before trying to lift it.
Additional Steps to Remove Batteries with Side-Mounted Terminals (like in GM models)
If you have a GM model, you might see side-mounted terminals on your battery instead of the typical top-mounted terminals. These can be more difficult to reach and could require additional tools, such as a side battery terminal wrench.
So, if you have this type of battery, simply follow the steps above but use a side battery terminal wrench to disconnect the negative and positive terminals.
Additional Steps to Remove Batteries From a Vehicle With Two Batteries (like a Diesel Pickup)
When removing a battery from most diesel pickups with two batteries, you need to remove both negatives cables before removing the positives cable or cables. Ideally, you would remove both negative cables first since the positive cable could / will carry a full charge and could cause some damage or injury if not disconnected. Extreme caution must be exercised if you do not at least disconnect the second battery’s negative cable.
How To Install a Car Battery
(Step-by-Step Guide)
Once the old battery is removed, you are ready to recondition the battery and then re-install it. Or you can even install a new battery in its place.
So to re-install the reconditioned battery or to install a brand new battery, follow these steps:
1. Clean Corrosion

Start by using a baking soda and water mixture to clean the battery tray if there is any leftover corrosion. We also recommend cleaning off the hold-down clamp and battery cable connectors in this step.
2. Put The Battery In Place & Secure It

Next, lift the battery and insert it into the tray. Remember to take a good stance before trying to lift the battery since they can be quite heavy.
Once the battery is back in the tray, secure it with the hold-down bracket that you removed earlier.
3. Attach Cables

Next, start by first attaching and tightening the positive battery cable.
To do this, simply slide the terminal over the post on the battery. Then, tighten the connection with your wrench.
Next, attach and tighten the negative battery cable by sliding the terminal over the post on the battery. Then, tighten this connection with your wrench as well.
When you are done with the negative battery cable, double-check the connections to ensure both are tightened completely. If they are not, you may struggle with a weak electrical connection.
Nice job! You’ve now successfully re-installed the car battery and you’re ready for the battery to start your car engine!
Car Battery Replacement FAQ
What happens if you disconnect the positive terminal first?
By starting with the negative battery cable, you disconnect it from the chassis. If you attempt to remove the positive side while the negative is still connected and your wrench contacts any metal, you could cause a short in the system.
I’ve re-installed or replaced the car battery, but I am still having trouble starting the engine. Now what?
If your vehicle starts after you put in a new battery, but it fails to start later, you might be struggling with a defective alternator instead. This is the electronic part that is responsible for charging the battery. Most people replace the alternator between 100,000 and 150,000 miles.
Does replacing the car battery affect my electronic components?
Removing the car battery will affect radio presets and the clock in nearly all vehicles. And modern vehicles may be affected by even more resets than older vehicles because there is more electronic equipment. In fact, the PCM might need to relearn all of the adjustments that made your vehicle’s ride smooth.
Thank You For Using This Guide
If you used this guide to remove and/or install a vehicle’s battery, great job! We hope you found this step-by-step guide very useful and easy to follow!
Thank you for taking the time to read it. And be sure to bookmark this page so you can come back and use it whenever you need to remove or re-install a battery in your vehicle in the future.
And if you want to learn even more about batteries and how to recondition old batteries so you can use them again and save money, then check out this presentation where we talk about the EZ Battery Reconditioning program.
Happy Battery Reconditioning,
Tom Ericson
2 replies to "How to Safely Remove & Then Re-install a Car Battery in Your Vehicle (direct)"
Very helpful. Thank you for the detailed guide.
Thank you, Tom. I just used this to change my battery.